写在开头
FastCGI_Cache是Nginx的缓存模块,能够从Nginx层面实现网页静态化,能有效提高网站的并发能力、减少PHP运行时间和请求响应时间。
当然,前提是你的服务器本身有足够的性能,如果只有1H1G,再怎么优化也无法显著提升。
需要注意的是,由于FastCGI_Cache缓存了PHP请求,导致部分需要运行PHP的功能会失效,例如阅读量统计,所以请自行斟酌得失。
下面是启用FastCGI_Cache的教程
创建缓存目录
我的服务器环境:TencentOS3+宝塔面板+Nginx-tengine
手动创建以下两个目录,并设置权限为755。
/tmp/wpcache
/tmp/wpcache/temp
通过终端创建
1
2
3
4
| mkdir /tmp/wpcache
mkdir /tmp/wpcache/temp
chmod 755 /tmp/wpcache
chmod 755 /tmp/wpcache/temp
|
也可以直接用宝塔面板创建
修改网站配置
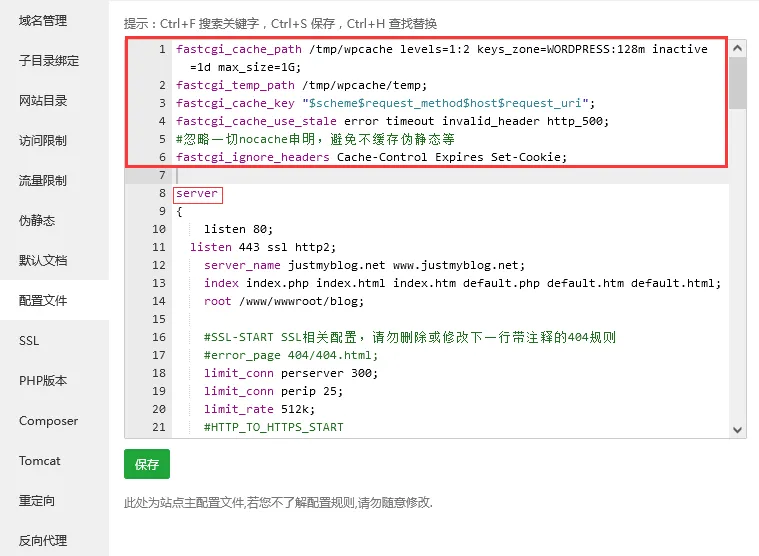
将以下代码插入网站配置的 server 块前面(注意不是 Nginx 配置!)
1
2
3
4
5
6
| fastcgi_cache_path /tmp/wpcache levels=1:2 keys_zone=WORDPRESS:128m inactive=1d max_size=1G;
fastcgi_temp_path /tmp/wpcache/temp;
fastcgi_cache_key "$scheme$request_method$host$request_uri";
fastcgi_cache_use_stale error timeout invalid_header http_500;
#忽略一切nocache申明,避免不缓存伪静态等
fastcgi_ignore_headers Cache-Control Expires Set-Cookie;
|
注意:
- 插入站点配置的方法适合单站点,如果需要开启多站点缓存请尝试直接修改 Nginx 配置。
- 在
keys_zone=WORDPRESS:128m中,WORDPRESS是缓存名,需要和下面的配置对应,128m是缓存大小限制,可以适当调整。 /tmp/wpcache是缓存路径,需要提前创建,不然宝塔面板可能会报错。
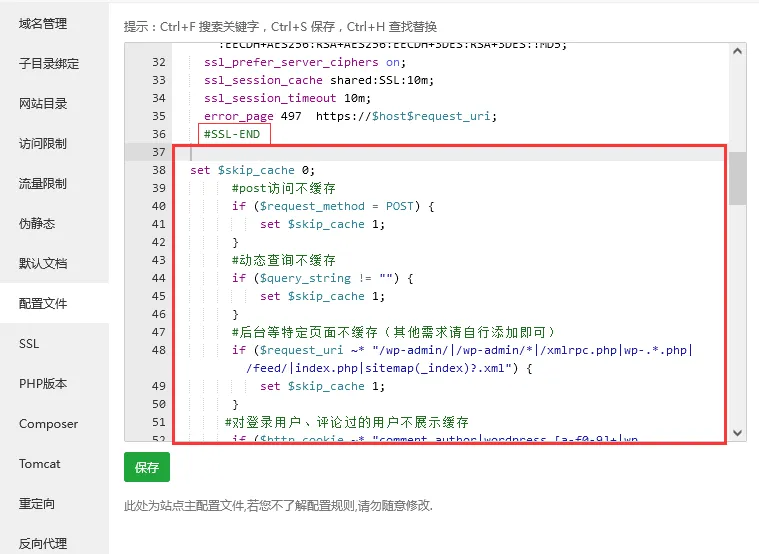
将以下代码插入网站配置 #SSL-END 注释后面
 1
 2
 3
 4
 5
 6
 7
 8
 9
10
11
12
13
14
15
16
17
18
19
20
21
22
23
24
25
26
27
28
29
30
31
32
33
34
35
36
37
38
39
| set $skip_cache 0;
#post访问不缓存
if ($request_method = POST) {
set $skip_cache 1;
}
#动态查询不缓存
if ($query_string != "") {
set $skip_cache 1;
}
#后台等特定页面不缓存(其他需求请自行添加即可)
if ($request_uri ~* "/wp-admin/|/wp-admin/*|/xmlrpc.php|wp-.*.php|/feed|/rss|index.php|sitemap(_index)?.xml") {
set $skip_cache 1;
}
#对登录用户、评论过的用户不展示缓存
if ($http_cookie ~* "comment_author|wordpress_[a-f0-9]+|wp-postpass|wordpress_no_cache|wordpress_logged_in") {
set $skip_cache 1;
}
#这里请参考你网站之前的配置,特别是sock的路径,弄错了就502了!关于sock,宝塔面板的在/www/server/php/你的php版本/etc/php-fpm.conf中有配置路径宝塔面板的sock
location ~ [^/]\.php(/|$)
{
try_files $uri =404;
fastcgi_pass unix:/tmp/php-cgi-74.sock;
fastcgi_index index.php;
include fastcgi.conf;
#新增的缓存规则
fastcgi_cache_bypass $skip_cache;
fastcgi_no_cache $skip_cache;
#添加一个头部,用于判断缓存状态
add_header X-Cache "$upstream_cache_status From $host";
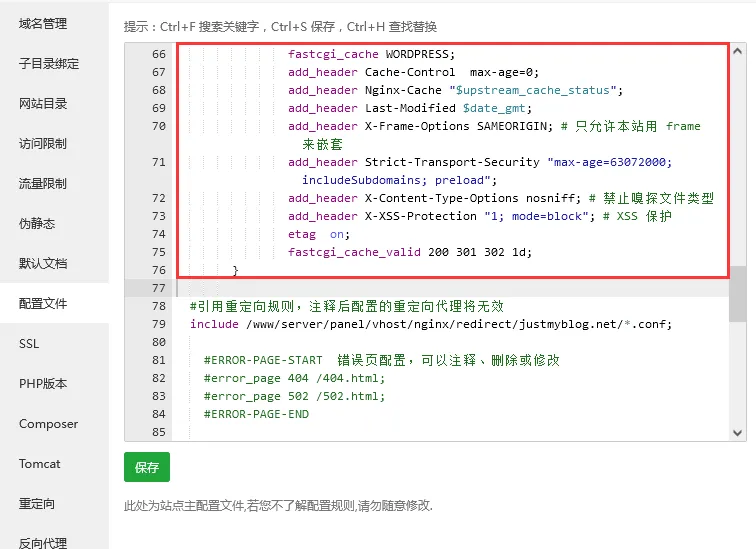
fastcgi_cache WORDPRESS;
add_header Cache-Control max-age=0;
add_header Nginx-Cache "$upstream_cache_status";
add_header Last-Modified $date_gmt;
add_header X-Frame-Options SAMEORIGIN; # 只允许本站用 frame 来嵌套
add_header X-Content-Type-Options nosniff; # 禁止嗅探文件类型
add_header X-XSS-Protection "1; mode=block"; # XSS 保护
etag on;
fastcgi_cache_valid 200 301 302 1d;
}
|
注意:
务必修改 sock 版本,默认PHP7.4,只需将其替换为你当前使用的版本。 例如你用的是PHP7.3就修改成 /tmp/php-cgi-73.sock- 这里没有配置 purge 地址,因为很容易出现冲突,下面将采取插件直接清除缓存目录的方法。(不懂的话你完全可以忽略这句)
- 建议阅读一下配置中的注释
检查缓存状态
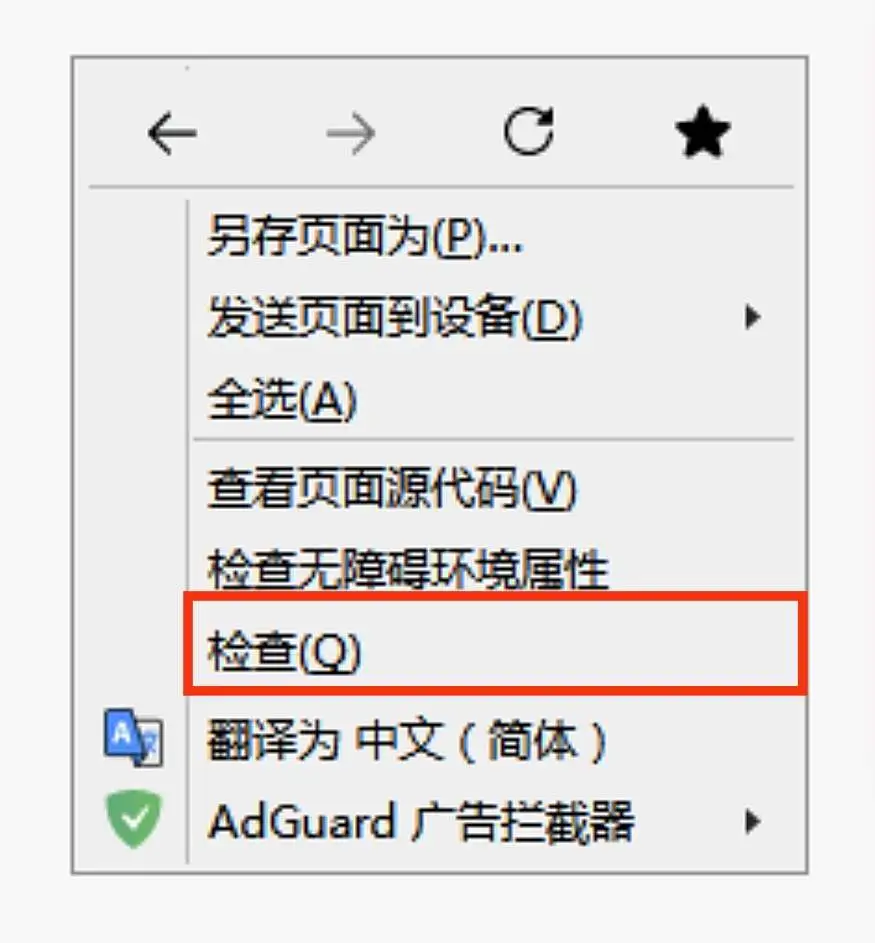
- 进入你的网站并注销登陆
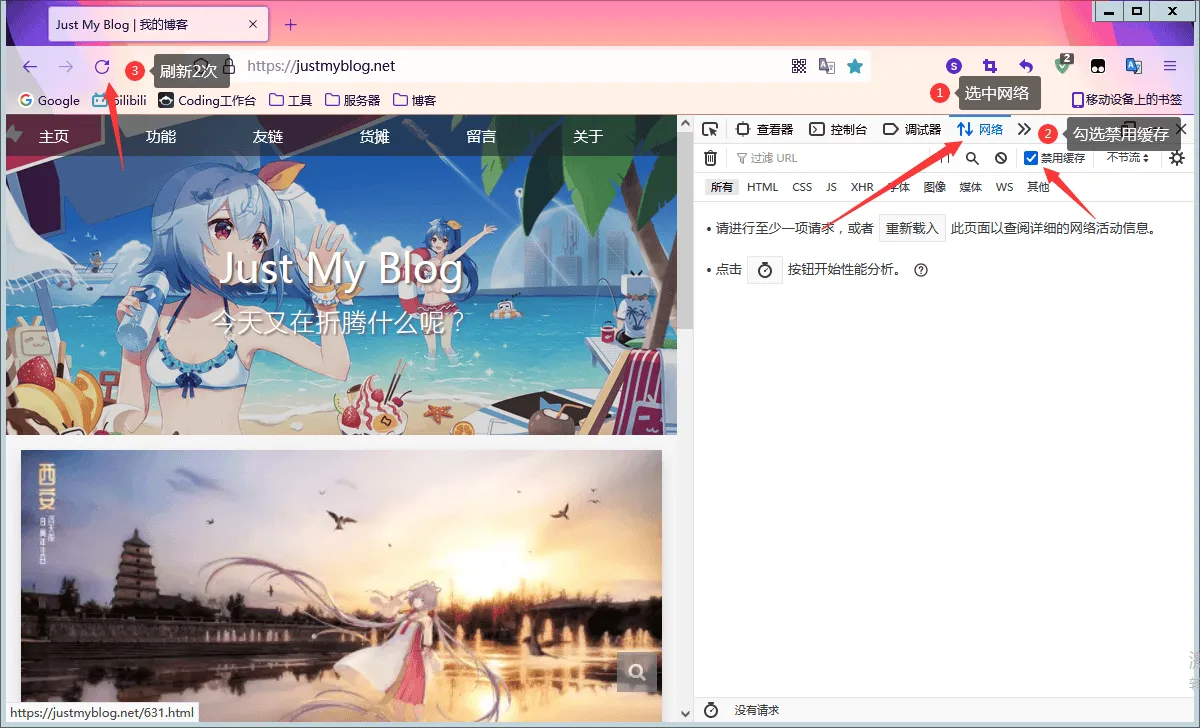
- 右键网页选择检查工具,并在打开的开发者工具中选择网络,勾选禁用缓存后刷新两次
- 选择页面文件查看信息头,如果显示HIT即为缓存成功!
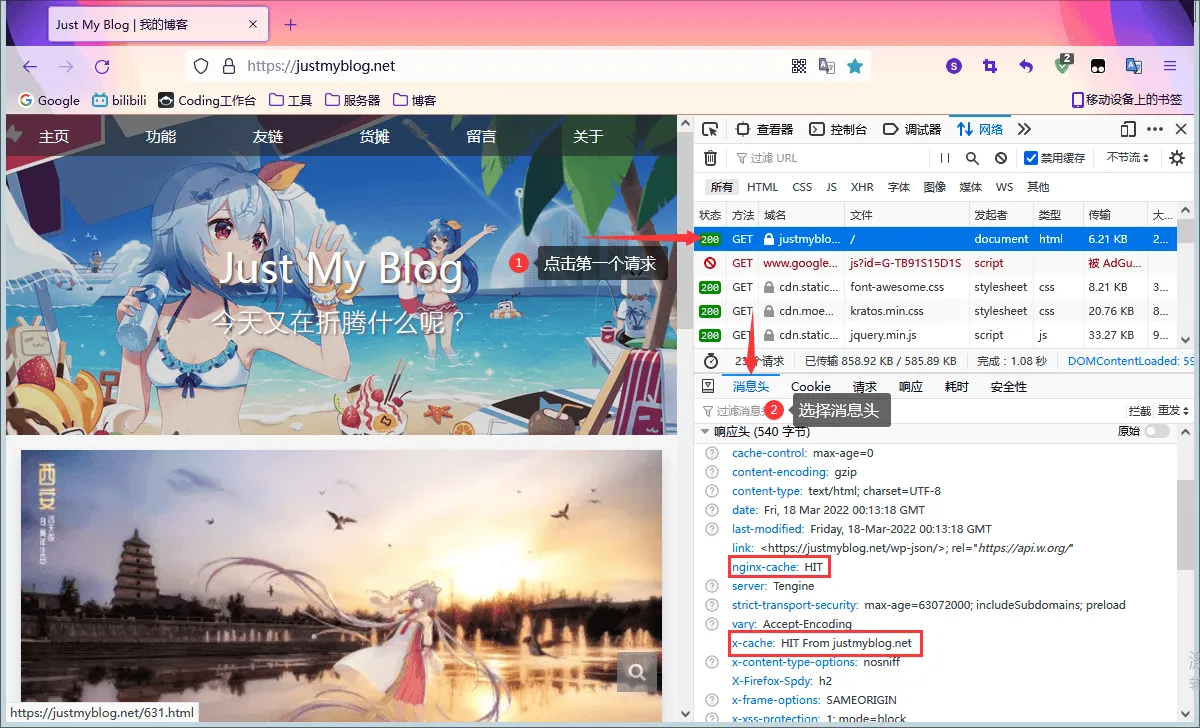
响应头释义
| 标识 | 解释 |
|---|
| HIT | 缓存有效 |
| MISS | 没有找到缓存 |
| BYPASS | 不缓存此请求 |
| EXPIRED | 缓存已过期 |
安装WP缓存清除插件
登陆 WP 后台搜索并安装 Nginx Helper 插件
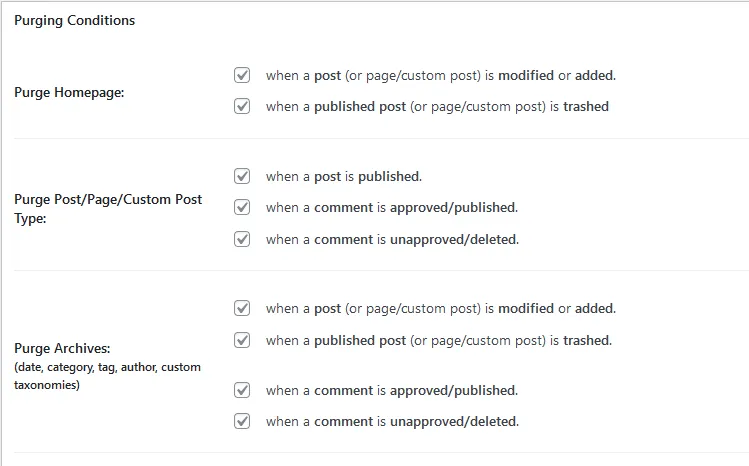
按图修改配置
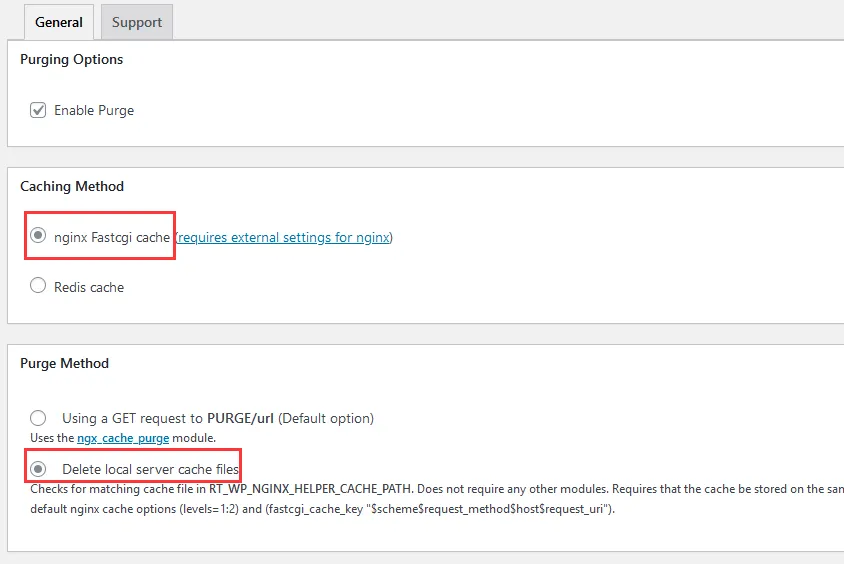
修改缓存清除路径
- 打开
/你的网站目录/wp-content/plugins/nginx-helper/includes/class-nginx-helper.php 找到RT_WP_NGINX_HELPER_CACHE_PATH (大概在第87行) - 将默认缓存路径
/var/run/nginx-cache 修改为/tmp/wpcache

然后就完成了
现在,没有登陆的用户访问到的是静态缓存,访客评论后会自动清缓存,管理员的请求不会被缓存。
当需要手动清除缓存的时候点击 Nginx Helper 插件里的Purge Entire Cache按键即可。
没有配置 Fastcgi_Cache 的 Nginx 是不完整的(bushi